Using the corer on a Kitchen Aid mixer is straightforward. First, attach the corer; then, use it to remove the cores from fruits and vegetables.
The Kitchen Aid mixer is a versatile kitchen tool. Its corer attachment makes food prep even more straightforward. This handy tool can quickly remove cores from apples, pears, and other fruits. No more struggling with knives or manual corers. With the Kitchen Aid corer, you can save time and effort.
Your fruits will be perfectly cored and ready for cooking or baking. This introduction will guide you through the steps to use the corer attachment. Let’s start by making your kitchen tasks more straightforward and efficient.
Components Of The Corer Attachment
The Corer Attachment for the Kitchen Aid Mixer is handy for effortlessly coring apples, pears, and other fruits. Understanding its components is essential for optimal use. Let’s break down the main parts and accessory tools of this helpful kitchen gadget.
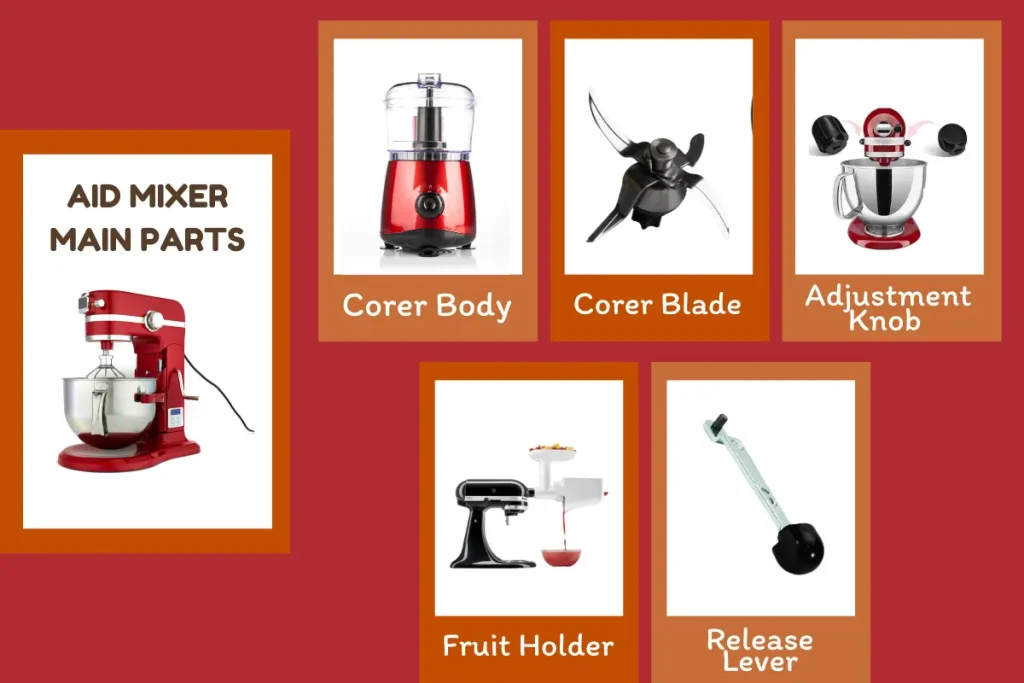
Main Parts
The Corer Attachment consists of several key parts, each with a specific function:
- Corer Body – The main structure that attaches to the mixer.
- Corer Blade – A sharp blade designed to remove the core from fruits.
- Adjustment Knob – Allows you to adjust the depth and size of the core.
- Fruit Holder – Secures the fruit in place during the coring process.
- Release Lever – Helps in detaching the core once the coring is complete.
Accessory Tools
In addition to the main parts, the Corer Attachment comes with several accessory tools that enhance its functionality:
| Accessory Tool | Function |
|---|---|
| Cleaning Brush | Helps in cleaning the corer blade and body. |
| Storage Case | Keeps all parts organized and easy to store. |
| Extra Blades | Provides replacements when the original blade dulls. |
These accessory tools ensure that you maintain and store the Corer Attachment properly, extending its lifespan and efficiency.
Assembling The Corer
Assembling the corer on your Kitchen Aid mixer can be simple and quick. Follow these steps to make sure your corer is attached correctly. This will help you core fruits and vegetables efficiently.
Attaching To The Mixer
First, ensure your Kitchen Aid mixer is turned off and unplugged. This is important for safety. Next, locate the attachment hub on the front of the mixer. Remove the hub cover by loosening the knob and pulling the cover off.
Take the corer attachment and insert the shaft into the hub. Align the shaft with the hub’s pin. Push the corer until it is fully inserted.
| Step | Action |
|---|---|
| 1 | Turn off and unplug the mixer |
| 2 | Locate and remove the attachment hub cover |
| 3 | Insert the corer shaft into the hub |
| 4 | Align the shaft and push fully |
Securing The Corer
Once the corer is attached, secure it by tightening the knob on the side of the hub. Make sure the corer is stable and does not move. This ensures safe and effective use.
Check the alignment of the corer. It should be straight and centered. If not, readjust and tighten the knob again.
Now, your corer is assembled and ready to use. Plug in the mixer and get started with your coring tasks.
- Tighten the knob to secure the corer
- Ensure the corer is stable
- Check alignment and readjust if needed
- Plug in the mixer and start coring
Preparing Your Ingredients
Before using the corer on your Kitchen Aid mixer, you must prepare your ingredients. Proper preparation ensures the best results and makes the coring process easier. Let’s break it down into two simple steps: choosing the right produce and washing and peeling.
Choosing The Right Produce
Selecting the right produce is key to a smooth coring experience. Here are some tips:
- Firmness: Choose fruits and vegetables that are firm but not too hard.
- Size: Ensure the produce fits into the corer attachment.
- Freshness: Fresh produce is easier to core and tastes better.
Here is a table of recommended produce for coring:
| Produce | Best Season |
|---|---|
| Apples | Fall |
| Pears | Fall |
| Bell Peppers | Summer |
Washing And Peeling
Once you have chosen your produce, the next step is washing and peeling. Follow these simple steps:
- Wash: Rinse your produce under cold running water to remove dirt and pesticides.
- Peel: Use a vegetable peeler to remove the outer skin if needed.
- Dry: Pat the produce dry with a clean towel.
Properly washed and peeled produce ensures a cleaner, more efficient coring process. By preparing your ingredients, you will enjoy better results with your Kitchen Aid corer attachment.
Operating The Corer
Using the corer on a Kitchen Aid mixer can make food prep easier. Follow these simple steps to operate the corer efficiently and safely.
Powering The Mixer
First, ensure your Kitchen Aid mixer is plugged in. The cord should be secure in the outlet. Switch the mixer on by turning the power knob. The mixer should start smoothly.
Select the correct speed setting for your task. Low speeds are best for soft produce. Higher speeds work well for firmer items.
Guiding The Produce
Prepare your produce by washing it thoroughly. Remove any stems or leaves. Place the produce onto the corer attachment.
Use the pusher tool to guide the produce. Apply gentle, steady pressure. The corer will remove the core and slice the produce.
Repeat with additional produce as needed. Clean the corer attachment after use.
Safety Tips
Using the corer on a Kitchen Aid mixer can be a fun task. But safety must come first. Following essential safety tips can prevent injuries and damage. Here are some essential safety tips to follow.
Avoiding Injuries
Always read the manual before using the corer. Check that the mixer is unplugged before attaching or removing the corer. Keep fingers and hands away from the corer blades. Use the pusher provided to feed fruits into the corer. Avoid wearing loose clothing or jewelry that could get caught.
Cleaning Safely
Unplug the mixer before cleaning the corer. Remove the corer attachment carefully. Wash it with warm, soapy water. Use a soft brush to clean the blades. Dry the corer entirely before storing it. Keep the corer out of reach of children.

Credit: www.kitchenaid.com
Cleaning And Maintenance
Cleaning and maintaining your Kitchen Aid Mixer’s corer is essential. It ensures your equipment stays in top shape and performs well. Regular upkeep also helps prevent any buildup of food particles, ensuring food safety and hygiene.
Disassembling The Corer
Start by turning off and unplugging the Kitchen Aid Mixer. This ensures safety during the disassembly process. Next, carefully remove the corer attachment. Refer to the user manual if needed.
Once removed, disassemble the corer into its parts. This typically includes the main body, blade, and any additional components. Take care to note the order and orientation of each part.
Place the parts on a clean surface. This prevents any loss or mixing up of components. Use a soft cloth to wipe off any large food particles or residues.
Washing And Storing
Washing the corer components is straightforward. Use warm, soapy water to clean each part thoroughly. Avoid using abrasive sponges to prevent scratches. Rinse each piece under running water to remove soap residues.
If you prefer, you can use a dishwasher for some parts. Check the user manual to see if your corer parts are dishwasher safe. Place them on the top rack for best results.
Drying each part is crucial. Use a clean, dry cloth to wipe down each component. Ensure no moisture remains to prevent rust or mold.
Storing the corer properly is just as important. Reassemble the corer once all parts are dry. Store it in a cool, dry place. Keep it away from direct sunlight or heat sources to prolong its lifespan.
| Step | Description |
|---|---|
| Disassemble | Remove corer and separate parts |
| Wash | Use warm, soapy water |
| Dry | Use a clean cloth |
| Store | Reassemble and keep in a dry place |
Follow these steps to keep your Kitchen Aid Mixer’s corer in excellent condition. Proper cleaning and maintenance ensure a long-lasting and efficient kitchen tool.
Troubleshooting Common Issues
Using the corer on a Kitchen Aid mixer can save time and effort. Yet, you might face some common issues. Here are tips to troubleshoot these problems effectively.
Jamming Problems
A common problem is jamming. Ensure the corer is not overloaded. Too much fruit or vegetable can cause this. Cut items into smaller pieces before coring. Also, check for any seeds or tricky parts. They can cause jams. Remove them if necessary. Regularly clean the corer. Bits of food can cause blockages. Use warm water and mild soap. Dry it thoroughly before using again. This prevents rust and ensures smooth operation.
Uneven Coring
Uneven coring can be frustrating. Make sure the food is centered. Off-center items can lead to uneven results. Adjust your placement if needed. Also, check the blade. A dull blade won’t cut evenly. Sharpen or replace it as required. Speed settings can affect coring, too. Use a medium speed for best results. Too fast or too slow can cause issues. Lastly, ensure the corer is securely attached. A loose attachment can cause uneven coring.
Creative Uses Of The Corer
The corer attachment for your Kitchen Aid mixer is more versatile than you might think. It’s not just for coring apples. You can use it with a bit of creativity for various kitchen tasks. This section explores innovative ways to use the corer in cooking and baking.
Recipe Ideas
Use the corer to make stuffed apples. Core the apples, fill them with a mixture of nuts, dried fruits, and spices. Bake until tender. They make a delicious dessert.
Prepare pineapple rings for grilling. Core the pineapple, slice it into rings, and grill. The result is a tasty side dish or dessert.
Try coring cucumbers for a unique salad. Core the cucumbers, slice them, and fill them with your favorite salad ingredients.
Innovative Techniques
Use the corer to hollow out zucchinis. Fill them with a savory stuffing of rice, herbs, and cheese. Bake until the zucchinis are tender.
Create elegant pear desserts. Core pears, poach them in wine, and serve with a drizzle of honey. This makes a simple yet sophisticated dessert.
Make homemade apple chips. Core the apples, slice them thinly, and bake until crispy. These make a healthy and crunchy snack.
Frequently Asked Questions
How Do You Attach The Corer?
To attach the corer, first ensure the mixer is off. Then, place the corer attachment onto the power hub and tighten the knob.
What Fruits Can Be Cored?
The Kitchen Aid corer can handle apples, pears, and similar fruits. It efficiently removes the core while preserving the fruit.
Is The Corer Dishwasher Safe?
Yes, the corer attachment is dishwasher safe. For best results, place it on the top rack.
Can The Corer Be Used For Vegetables?
The corer is designed primarily for fruits. However, it can also core vegetables like bell peppers and tomatoes.
Final Words
Using the corer on a Kitchen Aid mixer is simple and effective. Follow the steps carefully for best results. Your fruits and vegetables will be perfectly cored. This tool saves time and effort in the kitchen. Practice makes it even easier.

