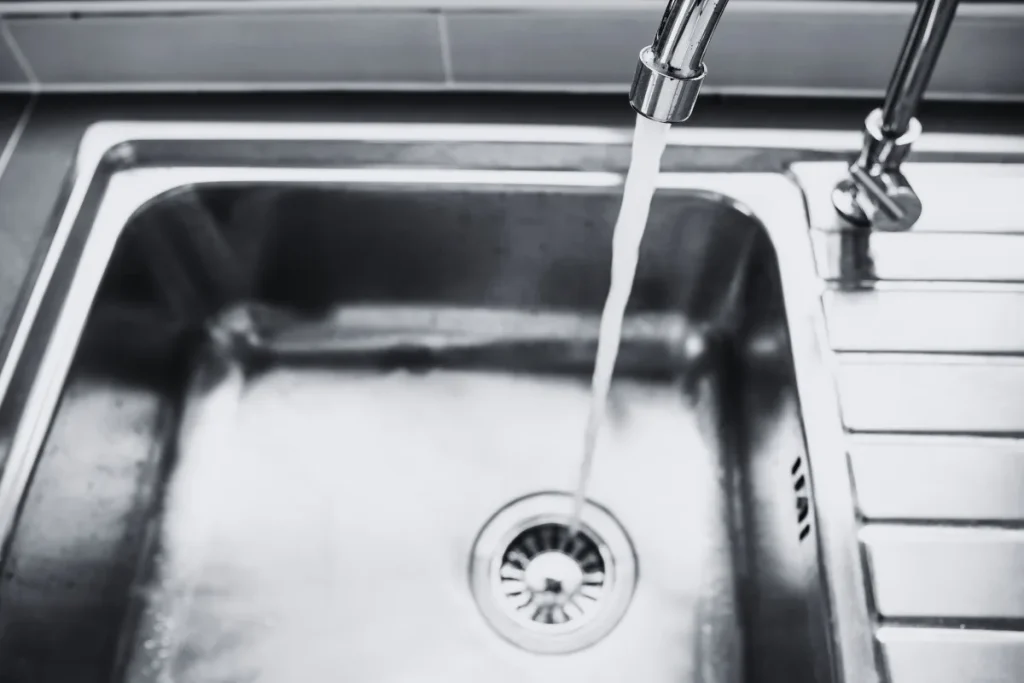
Changing your kitchen sink to a soft water system is simple. It can make a big difference in your daily life.
Soft water helps reduce limescale and makes cleaning easier. Switching to a soft water system in the kitchen can greatly improve water quality. Hard water contains minerals that can cause buildup on your sink and dishes. This buildup can be hard to clean and can damage appliances over time.
Soft water, on the other hand, is free of these harsh minerals. It can extend the life of your plumbing and appliances. Plus, it makes your skin and hair feel softer. This guide will walk you through converting your kitchen sink into a soft water system. You’ll enjoy cleaner dishes and longer-lasting appliances in no time.
Benefits Of Soft Water
Switching to a soft water system offers many advantages. This change impacts your health, home appliances, and even daily chores. Learn about the benefits of soft water below.
Health Advantages
Soft water is gentle on your skin and hair. It helps reduce dryness and irritation. You may notice smoother skin and shinier hair. It also minimizes soap scum, making showers more enjoyable. Soft water helps keep your skin’s natural oils balanced. This means fewer skin problems and a healthier glow.
Appliance Longevity
Soft water extends the life of your appliances. Hard water leaves mineral deposits that damage machines. Dishwashers, washing machines, and coffee makers last longer with soft water. They also work more efficiently, saving you money on energy bills. Soft water helps keep plumbing clear of clogs. This reduces maintenance costs and prevents costly repairs.
Assessing Your Current Sink Setup
Changing your kitchen sink to a soft water system is a great idea. Begin by assessing your current sink setup. This helps you understand what changes are needed. Let’s break down this process into key steps.
Identifying Sink Type
First, identify the type of sink you have. Is it a single-bowl or double-bowl sink? Is it an under-mount or a top-mount sink? Knowing your sink type helps you choose the right soft water system.
- Single-bowl sink: One large basin.
- Double-bowl sink: Two basins, often for multitasking.
- Undermount sink: Mounted below the countertop.
- Top-mount sink: Mounted above the countertop.
Current Water System Check
Next, check your current water system. Is it a city water supply or a healthy system? This affects the type of softener you need. Also, check for existing filters or water treatment units.
| Water Source | Considerations |
|---|---|
| City Water | Usually already treated but may still be hard. |
| Well Water | Often harder and may have other contaminants. |
Inspect your under-sink space. Ensure there is enough room for the new system. Measure the space and compare it with the system specifications. This avoids issues during installation.
Check the plumbing. Look for any signs of leaks or corrosion. Fix these issues before installing the soft water system. It ensures a smooth installation process.
Choosing The Right Soft Water System
Choosing the right soft water system for your kitchen sink can be a game-changer. It ensures cleaner dishes, smoother skin, and longer-lasting appliances. But with so many options, how do you make the best choice? This guide will help you understand the different types of soft water systems and the factors you should consider before purchasing.
Types Of Soft Water Systems
There are several types of soft water systems available. Each has its benefits and drawbacks. Here are the most common types:
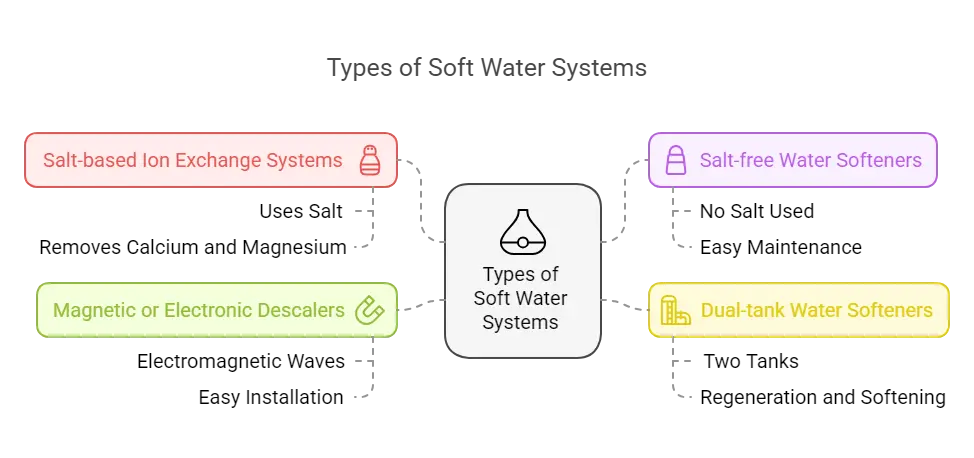
- Salt-based Ion Exchange Systems: These are the most popular. They use salt to remove minerals like calcium and magnesium.
- Salt-free Water Softeners: These use a different method to condition water without salt. They are easier to maintain.
- Dual-tank Water Softeners: These have two tanks. While one tank regenerates, the other continues softening water.
- Magnetic or Electronic Descalers: These use electromagnetic waves to prevent scale build-up. They are easy to install.
Factors To Consider
Choosing the right system depends on several factors. Here’s what you should think about:
- Water Hardness: Test your water. Higher hardness may need a more muscular system.
- Household Size: More people mean more water usage. Ensure the system can handle the volume.
- Budget: Prices vary. Consider both initial cost and ongoing maintenance.
- Space: Some systems need more room. Measure your installation area.
- Maintenance: Check how often you need to maintain the system. Some need frequent salt refills.
- Environmental Impact: Salt-based systems can affect the environment. Consider eco-friendly options.
You can choose a soft water system that best fits your needs by understanding these factors. This will ensure you enjoy soft water’s benefits in your kitchen.
Gathering Necessary Tools And Materials
The first step to changing a kitchen sink to a soft water system is gathering the necessary tools and materials. Collect a wrench, plumber’s tape, screwdriver, new faucet, and velvety water system components. Having everything ready will ensure a smooth process.
Changing your kitchen sink to a soft water system requires proper preparation. Gather all the necessary tools and materials beforehand to ensure a smooth process. This will save time and prevent unnecessary frustration. Below, we will outline this task’s essential tools and required materials.
Essential Tools
Having the right tools is crucial. These tools will help you complete the installation efficiently. Here are the essential tools: 1. Adjustable wrench: Useful for loosening and tightening connections. 2. Screwdriver: Needed for removing screws from various parts. 3. Pipe cutter: Helps in cutting pipes to the required length. 4. Plumber’s tape: Prevents leaks by sealing pipe threads. 5. Bucket: Catches any water that spills during the process. 6. Towel: Keeps your workspace clean and dry.
Required Materials
In addition to tools, you need specific materials. These materials ensure the new system works properly. Here are the required materials:
- Soft water system: Choose a system that fits your kitchen needs.
- Flexible hoses: Connect the system to your existing water lines.
- Pipe fittings: Adapt your current plumbing to the new system.
- Shut-off valves: This allows you to control the water flow easily.
- Teflon tape: Seals threaded pipe joints to prevent leaks.
- Pipe insulation: Protects pipes and maintains water temperature.
By gathering these tools and materials, you will be ready to start. Proper preparation makes the installation process smoother and more efficient. “`
Preparing The Workspace
Changing your kitchen sink to a soft water system is a great choice. It helps prevent mineral buildup and makes your water more enjoyable. First, you need to prepare your workspace. This step sets the stage for a smooth installation process. Let’s dive into the details.
Clearing The Area
Start by clearing the area under your sink. Remove cleaning supplies and other items. This gives you room to work. Clear the countertops too. You will need space for your tools and parts. Make sure to have a clean, open space to avoid accidents.
Safety Precautions
Safety is key. Turn off the water supply before starting. This prevents leaks and water damage. Wear gloves to protect your hands from sharp edges. Use goggles to shield your eyes from debris. Keep a fire extinguisher nearby in case of electrical issues.
Ensure good ventilation in your workspace. This helps avoid inhaling any fumes from cleaning agents or materials you use. Check all tools and equipment for damage. Using damaged tools can be dangerous. Finally, keep children and pets away from the work area. This keeps everyone safe.
Removing The Existing Sink
Changing your kitchen sink to a soft water system begins with removing the old sink. This step involves a few key tasks. Disconnecting the water supply and detaching the sink are crucial parts of the process. Follow these steps carefully to ensure a smooth transition to your new soft water system.
Disconnecting Water Supply
First, locate the main water valve. Turn it off to stop the water flow. This prevents any leaks or spills during the removal process. Next, open the faucet to drain any remaining water in the pipes. This step ensures that no water is left in the system.
After draining, use a wrench to disconnect the water supply lines. These lines are usually found under the sink. Loosen the nuts connecting the lines to the faucet. Then, carefully pull the lines away from the faucet.
Detaching The Sink
Once the water supply is disconnected, you can start detaching the sink. Begin by removing any clips or brackets holding the sink in place. These are often located under the countertop. Use a screwdriver or a similar tool for this task.
After removing the clips, gently lift the sink from the countertop. Use a utility knife to cut through any sealant if the sink is stuck. Carefully remove the sink to avoid damaging the countertop.
With the sink removed, you can now clean the area. Remove any old sealant or debris. This step prepares the space for your new soft water system.
Installing The Soft Water System
Switching to a soft water system for your kitchen sink can improve water quality. The process involves a few steps but can be done by most homeowners. Follow these instructions to install your new soft water system smoothly.
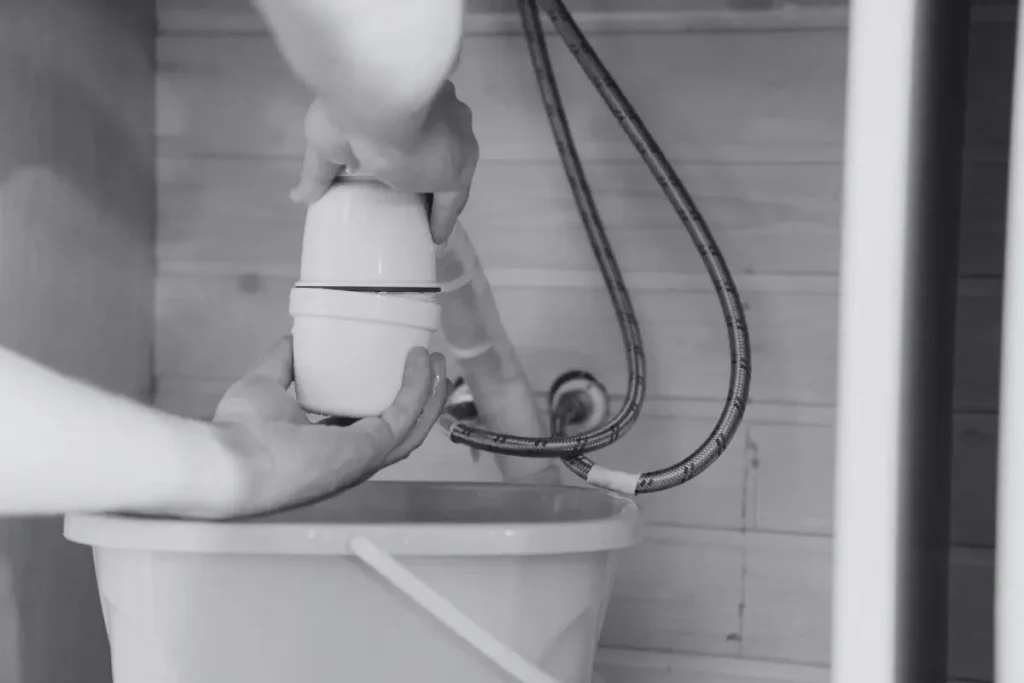
Mounting The System
Find a suitable location under the sink for the softener unit. Ensure there’s enough space for both the unit and future maintenance. Use a pencil to mark where the mounting brackets will go.
Drill holes where you’ve marked and secure the brackets with screws. Make sure the unit is stable and level. This will prevent any issues during operation.
Connecting The Plumbing
Turn off the water supply to the sink. This prevents leaks during installation. Detach the existing pipes from the sink faucet and drain.
Attach the inlet and outlet hoses to the softener unit. Follow the manufacturer’s instructions for this step. Ensure all connections are tight to prevent leaks.
Reconnect the plumbing to the sink faucet and drain. Turn the water supply back on and check for any leaks. If everything is secure, your system should be ready to use.
Testing And Final Adjustments
After installing your new kitchen sink soft water system, ensuring everything works perfectly is crucial. This involves thorough testing and making final adjustments. These steps guarantee that your system runs smoothly and provides the best water quality.
Checking For Leaks
Begin by turning on the water supply to your new system. Check every connection point for leaks. Use a dry cloth to wipe around the joints.
- If you notice any water, tighten the connections.
- Use the plumber’s tape if needed for a better seal.
- Ensure there are no drips or damp spots.
Keep the water running for a few minutes. This helps you spot any slow leaks. Fix any issues immediately to avoid future problems.
System Calibration
Next, calibrate your soft water system. This ensures it produces the right water softness.
- Refer to the manufacturer’s instructions for specific calibration steps.
- Adjust the settings based on your water hardness level.
- Test the water output using a water hardness test kit.
- Make necessary adjustments until the desired softness is achieved.
Repeat the testing process if needed. This guarantees optimal performance of your soft water system.
Finally, enjoy the benefits of your new soft water system. Your kitchen tasks will become more manageable, and your appliances will last longer.
Maintenance Tips
Maintaining your kitchen sink’s soft water system is crucial for its efficiency. Proper care ensures the system provides soft water consistently. Here are essential maintenance tips to keep your system in top shape.
Regular Cleaning
Regular cleaning prevents buildup and keeps the system functioning well. Clean the system at least once a month.
| Component | Cleaning Frequency | Cleaning Method |
|---|---|---|
| Filter | Monthly | Rinse with water |
| Salt Tank | Quarterly | Empty and wipe |
| Brine Tank | Annually | Scrub with a brush |
Filter Replacement
Replacing the filter is vital for the system’s efficiency. A clean filter ensures optimal water flow and quality.
- Check the filter every three months.
- Replace it if it appears dirty or clogged.
- Follow the manufacturer’s instructions for filter replacement.
Keeping up with these maintenance tasks ensures your kitchen sink’s soft water system performs well. Regular cleaning and timely filter replacement are key.
Frequently Asked Questions
What Tools Do I Need To Change A Kitchen Sink?
You’ll need wrenches, pliers, and a screwdriver to change a kitchen sink to a soft water system. Additionally, buckets and towels are helpful for water spills.
How Long Does It Take To Change A Sink?
Changing a kitchen sink to a soft water system takes about 2-4 hours. This depends on your experience and the system complexity.
Do I Need A Plumber To Install A Soft Water System?
While it’s possible to install a soft water system yourself, hiring a plumber ensures proper installation. This can prevent future issues.
How Do I Maintain My New Soft Water System?
Regularly check and refill the salt in your soft water system. Clean the brine tank and resin bed annually for optimal performance.
Final Words
Switching your kitchen sink to a soft water system offers many benefits. Enjoy cleaner dishes and fewer mineral deposits. The installation process is straightforward and manageable. With the right tools, you can do it yourself. Remember to follow safety guidelines.
Soft water can improve your daily life. Say goodbye to complex water problems. Now, your kitchen is more efficient and comfortable.

