Demolishing a small kitchen can vary in cost. It depends on several factors.
Are you planning a kitchen renovation? Knowing the cost of demolishing it helps. Whether replacing old cabinets or redesigning the layout, demolition is the first step. Costs can vary depending on the kitchen’s size, complexity, and region. Removing cabinets, countertops, and appliances takes time and money.
Hiring professionals might increase costs but ensure safety and efficiency. Doing it yourself might save money but requires careful planning. Understanding these factors will help you estimate the budget needed. Ready to find out more? Let’s explore the details of kitchen demolition costs.
Credit: homeguide.com
Preparation And Planning
Preparation and planning are crucial steps before demolishing a small kitchen. Proper planning ensures a smooth and safe process and helps manage costs and timelines effectively.
Assessing The Scope
First, identify what needs to be demolished. Is it just the cabinets and countertops? Or are you taking down walls and floors, too? Knowing the extent of the work helps in estimating time and costs.
Check for hidden elements. Look for plumbing, electrical wiring, and gas lines. These need careful handling. Mistakes can lead to accidents or damage.
Gathering Necessary Permits
Check local regulations. Many areas require demolition permits, which can lead to fines or delays.
Contact your local building authority. They will inform you about the required permits. This step is essential for legal and safety reasons.
Submit the necessary paperwork. Ensure all forms are complete and accurate to avoid any legal issues later.
Budgeting
Budgeting for a kitchen demolition can be tricky. Understanding the costs involved will help you plan better. Knowing what to expect avoids surprises. Let’s break down the expenses.
Cost Estimates
The cost to demolish a small kitchen varies, but it typically ranges from $500 to $2,000. This price depends on several factors.
- Size of the kitchen: Larger kitchens cost more to demolish.
- Materials: Some materials are more complex to remove.
- Labor: Hiring professionals increases costs but ensures safety.
- Permits: Some areas require demolition permits.
Getting multiple quotes from contractors helps you find the best deal.
Hidden Expenses
Hidden expenses can add up quickly. It’s essential to budget for these unexpected costs.
| Expense | Estimated Cost |
|---|---|
| Asbestos Removal | $500 – $1,200 |
| Mold Remediation | $500 – $3,000 |
| Disposal Fees | $200 – $500 |
| Structural Repairs | $300 – $1,000 |
These costs can significantly impact your budget. Always plan for the unexpected. Allocate extra funds for these hidden expenses.
Budgeting for kitchen demolition is essential. Knowing the cost estimates and hidden expenses ensures a smooth project. Plan wisely to avoid financial stress.
Choosing A Contractor
Demolishing a small kitchen typically costs between $500 and $2,000. Factors include size, location, and necessary permits. Hiring a reputable contractor ensures safe, efficient work.
Picking the right contractor is key to a smooth kitchen demolition. The right professional ensures safety, efficiency, and quality. But how do you choose the best one?
Finding The Right Professional
Begin by seeking recommendations from friends or family. Personal experiences can help you find reliable contractors. Check online reviews to see what past clients say. Look for contractors with high ratings and positive feedback. Experience matters. Choose contractors who have done many kitchen demolitions. They know the tricks of the trade. Make sure the contractor has the proper licenses. This shows they follow local regulations.
Evaluating Quotes
Get quotes from at least three contractors. This helps you compare prices and services. Make sure each quote includes all costs. Hidden fees can surprise you later. Ask for a detailed breakdown of the quote. This way, you know what you are paying for. Check if the contractor offers a warranty. A warranty shows they stand by their work. Don’t always choose the cheapest option. Sometimes, you get what you pay for. Quality service might cost more, but it saves money in the long run. “`

Credit: discountdumpsterco.com
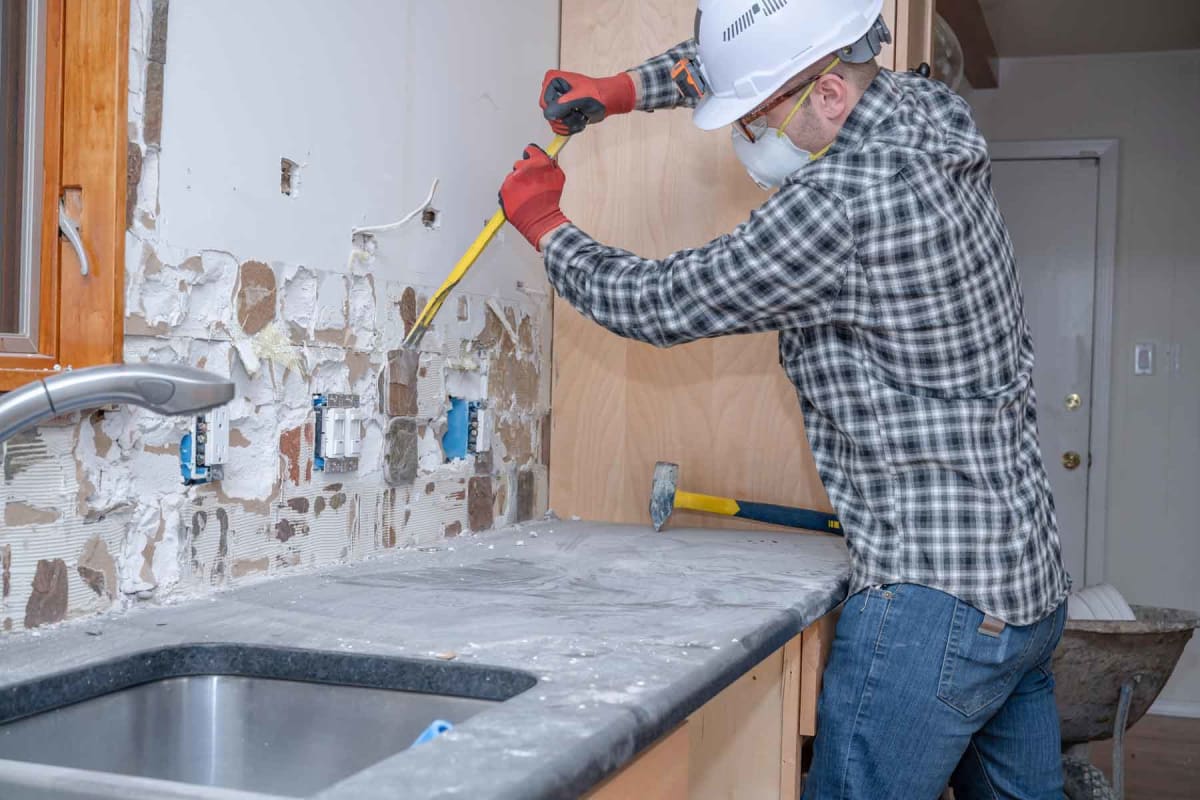
Diy Demolition
Demolishing a small kitchen yourself can save you money. If you enjoy hands-on work, it can also be a fun project. Before you start, knowing what tools you’ll need and what safety precautions to follow is crucial. Here’s a detailed guide to help you with your DIY kitchen demolition.
Tools Needed
- Hammer: For breaking tiles and walls.
- Pry Bar: Useful for removing cabinets and countertops.
- Screwdriver: To unscrew fixtures and fittings.
- Utility Knife: For cutting through caulking and drywall.
- Reciprocating Saw: Handy for cutting through wood and metal.
- Shop Vac: Keeps the area clean during demolition.
- Safety Gear: Includes gloves, goggles, and a dust mask.
Safety Precautions
Safety should be your top priority during a DIY demolition. Here are some essential safety precautions to follow:
- Turn Off Utilities: Ensure gas, water, and electricity are turned off.
- Wear Safety Gear: Wear gloves, goggles, and a dust mask.
- Check for Hazardous Materials: Be aware of asbestos and lead paint. Consult a professional if needed.
- Ventilate the Area: Open windows and doors to keep the area well-ventilated.
- Use Proper Tools: Ensure all tools are in good condition and used correctly.
Following these guidelines will make your DIY demolition safer and more efficient.
Step-by-step Demolition Process
Demolishing a small kitchen can be an exciting yet challenging task. Following a step-by-step process ensures safety and efficiency. This guide will help you navigate each stage of the demolition process smoothly.
Disconnecting Utilities
Before starting any demolition work, you must disconnect all utilities. Turn off the electricity at the main breaker. This step prevents accidental shocks. Shut off the water supply to avoid flooding. Make sure to disconnect gas lines if your kitchen has gas appliances. Safety should be your top priority during this step.
Removing Appliances
Once utilities are disconnected, begin removing appliances. Start with the refrigerator by emptying, unplugging, and moving it out of the kitchen area. Next, detach the stove and oven. These can be heavy, so ask for help if needed. Disconnect the water supply and power from the dishwasher. Finally, remove the microwave and any other small appliances.
Disposal Of Debris
Once you have demolished your small kitchen, the next step is disposing of debris. This process can be challenging if not planned well. Debris includes broken cabinets, tiles, and other materials. Proper disposal ensures a clean and safe environment.
Recycling Options
Recycling is a great way to manage kitchen demolition debris. Many materials, including metals, glass, and some plastics, can be recycled. Check with your local recycling center to see what materials they accept.
Here are some common materials and their recycling options:
- Metal: Old appliances and fixtures can be taken to scrap metal recyclers.
- Glass: Glass items can often be recycled curbside or at local facilities.
- Wood: Salvaged wood can be reused or taken to wood recycling centers.
- Tiles: Check if a local recycling center accepts ceramic or porcelain tiles.
Hiring A Dumpster
For large amounts of debris, hiring a dumpster is practical. It saves time and effort. Dumpsters come in various sizes. Choose one based on the amount of debris.
Consider these factors when hiring a dumpster:
- Size: Ensure the dumpster size matches your needs.
- Location: Place it in an accessible spot.
- Duration: Determine how long you need the dumpster.
- Cost: Compare prices from different providers.
Here’s a simple table to illustrate standard dumpster sizes and their uses:
| Dumpster Size | Use Case |
|---|---|
| 10-yard | Small kitchen remodels |
| 20-yard | Medium kitchen remodels |
| 30-yard | Large kitchen remodels |
Following these guidelines ensures debris is disposed of efficiently and responsibly.
Post-demolition Cleanup
After demolishing a small kitchen, a thorough cleanup is necessary to ensure a safe and clean space for the next steps. Post-demolition cleanup involves removing dust and debris and checking for damage.
Proper cleanup makes the area ready for renovation. It also protects you and the workers from potential hazards.
Cleaning Up Dust
Dust will be everywhere after demolition. The best vacuum has a HEPA filter, which effectively captures fine particles. Sweep the floors and wipe down surfaces with damp cloths. Remember to clean light fixtures and vents, as they can trap dust.
Wear a mask and gloves during this process. They protect you from inhaling or touching harmful particles. The collected dust must be disposed of properly to maintain a healthy environment.
Inspecting For Damage
Check the walls, floors, and remaining fixtures for damage. Look for cracks, holes, or water damage. Also, the plumbing and electrical systems, which may have been affected during the demolition, should be paid attention to.
If you find any issues, it’s best to address them immediately. This prevents further problems during renovation, and repairing damages early saves time and money later on.
Preparing For Renovation
Before you start demolishing your small kitchen, you need to prepare. Proper preparation ensures that your renovation goes smoothly and helps prevent costly mistakes. Let’s explore some key steps to prepare you.
Planning The New Layout
First, decide on the new layout for your kitchen. Think about how you use the space. Do you need more storage? Better lighting? A bigger counter? Make a list of your needs and wants.
Next, sketch a basic design. Use graph paper or an online tool to help you visualize the new layout. Then, carefully measure your kitchen and double-check the measurements to avoid errors.
Consider the work triangle, the space between the sink, stove, and refrigerator. A good work triangle makes cooking easier. It should be efficient and not too crowded.
Scheduling Contractors
Once you have a plan and schedule contractors, you might need a plumber, electrician, and carpenter. Research and choose reliable professionals. Read reviews and ask for recommendations.
Contact each contractor to discuss your project. Share your plans and budget. Get quotes from at least three contractors. This helps you find the best price.
Plan the demolition and renovation timeline, coordinate with your contractors, and ensure everyone knows the schedule. This will prevent delays and confusion.
Finally, prepare your home. Set up a temporary kitchen if needed. Protect your furniture and floors. Clear the kitchen of all items. This makes the demolition process more manageable and safer.
With proper preparation, your kitchen renovation will be smooth and stress-free. Happy renovating!
Frequently Asked Questions
How Much Does Small Kitchen Demolition Cost?
The cost to demolish a small kitchen varies, but it typically ranges from $500 to $2,500. Factors like kitchen size and materials affect the price.
What Factors Influence Kitchen Demolition Costs?
Several factors influence costs, including kitchen size, materials, and labor. Disposal fees or unexpected issues may also cause additional expenses.
How Long Does Kitchen Demolition Take?
Kitchen demolition generally takes 1 to 3 days. The duration depends on the kitchen’s size and complexity.
Do I Need A Permit For Kitchen Demolition?
In many areas, a permit is required for kitchen demolition. Check with your local authorities for specific regulations.
Tips For Demolishing A Small Kitchen
Demolishing a small kitchen is not too complex. Here are the tips:
- Costs vary by location and scope.
- Budget for labor, permits, and disposal fees.
- Hiring professionals ensures safety and efficiency.
- Planning helps avoid unexpected expenses.
- Research and compare quotes from multiple contractors.
A well-executed demolition prepares your space for a fresh start. Ready to transform your kitchen? Start with a clear plan and budget.

