Sharpening kitchen knives is essential for safe and efficient cooking. Dull knives can make food preparation difficult and dangerous.
A sharp knife is a chef’s best friend, but even the best knives lose their edge over time. Knowing how to sharpen kitchen knives at home can save you time and money and ensure a smoother cooking experience. Adequately sharpened knives make cutting, slicing, and dicing tasks easier.
They also help maintain the integrity of your ingredients. This guide will explore simple methods for keeping kitchen knives sharp and ready. There is no need for professional tools or complicated techniques—just easy steps you can follow to improve your kitchen skills. Let’s dive in and make your knives cut like new again.

Choosing The Right Tools
Choosing the right tools is crucial for sharpening your kitchen knives. The correct equipment ensures your blades stay sharp and safe to use. Let’s explore the different tools and accessories you’ll need.
Types Of Sharpeners
Sharpeners come in various types, each with its pros and cons. Here are some standard options:
- Whetstones: These are traditional and versatile. They require practice but give excellent results.
- Electric Sharpeners: Fast and user-friendly. Ideal for beginners.
- Manual Pull-Through Sharpeners: Simple to use. Good for quick fixes.
- Honing Rods: Maintain edge sharpness between full sharpening sessions.
| Type | Pros | Cons |
|---|---|---|
| Whetstones | Versatile, Excellent results | Requires practice |
| Electric Sharpeners | Fast, User-friendly | Can be expensive |
| Manual Pull-Through Sharpeners | Simple, Quick | Less precision |
| Honing Rods | Maintains sharpness | Doesn’t sharpen |
Essential Accessories
Along with sharpeners, several accessories can aid in the sharpening process:
- Cutting Board: Provides a stable surface for safe sharpening.
- Angle Guides: Helps maintain consistent angles for better results.
- Lubricants: Use water or oil to reduce friction on whetstones.
- Cleaning Cloth: Wipe down your knives after sharpening to remove debris.
These accessories make the sharpening process smoother and more effective, helping you achieve the best results for your kitchen knives.
Preparing The Knife
Preparing your kitchen knives properly is crucial before sharpening them. This step ensures a smooth and effective sharpening process. Let’s delve into the essential tasks involved in preparing your knife.
Cleaning The Blade
First, clean the blade thoroughly. Use warm water and dish soap to remove any food residue. A clean blade allows for better sharpening and reduces the risk of contamination. Then, dry the knife entirely with a soft cloth. This prevents rust and keeps the blade in good condition.
Inspecting For Damage
Next, inspect the blade for damage. Look for chips, cracks, or bends. These issues need to be addressed before sharpening. A damaged blade can cause accidents and won’t sharpen evenly. If you find any significant damage, consider getting the blade professionally repaired. Minor chips or scratches can be smoothed out during the sharpening process.
Following these steps, you ensure your knife is ready for sharpening. A clean, damage-free blade produces a sharper, more efficient knife.
Sharpening With A Whetstone
Sharpening kitchen knives with a whetstone is a traditional and effective method for keeping them in top shape. It takes some practice, but it is worth the effort. Here is a guide on how to sharpen your knives using a whetstone.
Soaking The Stone
First, soak your whetstone in water for 10-15 minutes. The stone needs to be fully saturated, which helps in the sharpening process. When it’s ready, bubbles will stop forming. Place a wet towel under the stone to prevent it from slipping while you work.
Maintaining The Angle
Maintaining the right angle is crucial. A 20-degree angle works for most knives. Use a guide if needed. Hold the knife firmly. Stroke the blade across the stone. Move from the base to the tip. Repeat this process 10-15 times per side. Check your progress often. Use light pressure for the best results.
Credit: noshingwiththenolands.com
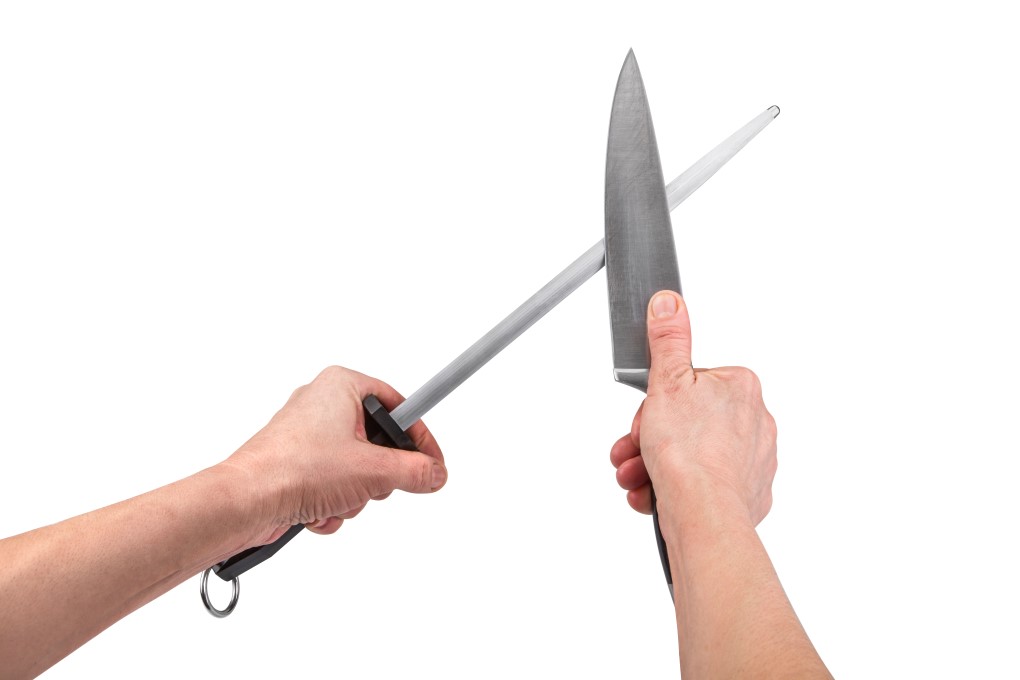
Using A Honing Rod
Keeping your kitchen knives sharp is essential for safe and efficient cooking. One of the best tools for this is a honing rod. This tool helps maintain the edge of your knife, making it sharp and ready for use.
Proper Technique
Hold the honing rod vertically, with the tip resting on a stable surface. Hold the knife at a 20-degree angle to the rod. Swipe the blade from the heel to the tip along the rod, using light and consistent pressure. Repeat the process on the other side of the blade. Perform this action about five to ten times on each side.
Frequency Of Use
Use the honing rod regularly to keep your knives in good shape. For home cooks, once a week is ideal. If you cook daily, consider honing your knife every few days. Honing often will help maintain the sharpness and extend the life of your knives.
Electric Knife Sharpeners
Electric knife sharpeners offer a quick and efficient way to sharpen kitchen knives. They are user-friendly and suitable for those new to knife sharpening. These devices use electric power to grind and hone the blade, ensuring a sharp edge with minimal effort.
Advantages And Disadvantages
Electric knife sharpeners have several advantages. They save time and effort, are easy to use and require little skill, provide consistent results, and often have multiple stages for different levels of sharpening.
There are also some disadvantages. They can be expensive and may remove more metal from the blade than manual methods. They can also be noisy and unsuitable for knives, such as serrated or delicate blades.

Step-by-step Guide
Follow these steps to sharpen your knife with an electric sharpener:
- Read the manufacturer’s instructions carefully.
- Turn on the sharpener and select the appropriate slot.
- Hold the knife firmly and place it in the slot.
- Pull the knife through the slot slowly and steadily.
- Repeat the process as recommended, usually 2-3 times per slot.
- Switch to the next slot if your sharpener has multiple stages.
- Wipe the blade clean after sharpening.
You can effortlessly maintain sharp and efficient kitchen knives by following these steps.
Sharpening Serrated Knives
Serrated knives have unique edges. They require special care when sharpening. These knives are great for slicing bread and tomatoes. Their toothed edges make them different from regular knives. Let’s explore how to keep them sharp.
Specialized Tools
Sharpening serrated knives needs specific tools. A ceramic honing rod works well. It fits between the teeth of the serrated edge. Diamond-coated rods are another option. They offer precision and durability. Some people use small sharpening stones.
Choose a tool that fits the knife’s serrations. Each knife is different, and the right tool makes a big difference. It ensures the knife stays sharp longer.
Technique For Serrations
Sharpen each serration individually. Start with the first tooth. Place the rod in the groove. Move the rod back and forth, using gentle strokes. Repeat this for each tooth, keeping the angle steady. Consistent angles ensure even sharpening.
Check your progress often. Look at the edge, feel it with your finger, and stop when the teeth feel sharp. This method takes time, but it’s worth the effort for a sharp serrated knife.
Maintaining Sharpness
Maintaining sharpness is crucial for kitchen knives. Dull knives can be dangerous and ineffective. Proper care ensures your knives stay sharp for longer. This section covers essential tips for maintaining sharpness.
Proper Storage
Store your knives correctly to prevent dulling. Use a knife block or magnetic strip to keep blades from knocking against each other. Avoid tossing knives in a drawer, as this can damage the edge. Protective sheaths are also helpful, adding an extra layer of safety.
Regular Maintenance
Regular maintenance is key to sharp knives. Hone your knife regularly. Honing realigns the blade edge. Use a honing rod for this task. Sharpen your knives periodically. Use a whetstone or sharpening tool. Ensure you follow the correct angle. This keeps the edge precise. Clean your knives properly. Hand wash and dry them immediately. Avoid dishwashers. The heat and detergent can harm the blade.
Safety Tips
Sharpening kitchen knives is essential for their performance and longevity. However, safety should always be your top priority. Handling sharp tools can be dangerous if not done correctly. Follow these safety tips to ensure a safe and effective sharpening process.
Handling Knives Safely
Always hold the knife by the handle. Keep your fingers away from the blade. Use a non-slip mat to stabilize the sharpening stone. This prevents the stone from moving during sharpening. Wear cut-resistant gloves for extra protection. Keep your sharpening tools clean and dry. Wet or greasy surfaces can cause slips.
Avoiding Common Mistakes
Avoid applying excessive force while sharpening, as this can damage the blade. Maintain a consistent angle throughout the sharpening process, as an inconsistent angle can lead to uneven sharpening. Don’t rush the process; take time to ensure a sharp and even edge. Make sure to sharpen both sides of the blade equally, keeping the knife balanced. Avoid using a dull sharpening tool, making the knife less effective.
Here’s a table outlining safety tips for sharpening kitchen knives:
| Safety Tip | Description |
|---|---|
| Use a Stable Surface | Place the sharpening stone or tool on a non-slip, flat surface to prevent movement during sharpening. |
| Wear Cut-Resistant Gloves | Protect your hands with cut-resistant gloves to avoid accidental cuts. |
| Secure the Sharpening Tool | Ensure the sharpening stone or tool is firmly secured to avoid slipping. |
| Maintain a Consistent Angle | Hold the knife at the correct angle (usually 15-20°) to avoid uneven sharpening or injury. |
| Sharpen Away from Your Body | Always move the knife away from your body to reduce the risk of cutting yourself. |
| Use Light Pressure | Apply gentle, even pressure to avoid slipping or damaging the blade. |
| Keep Fingers Clear | Ensure proper lighting to see the blade and sharpening tool. |
| Work in a Well-Lit Area | Focus solely on the task of preventing accidents. |
| Avoid Distractions | Test the sharpness by slicing paper or a tomato, not running your finger along the edge. |
| Store Sharpening Tools Safely | Keep sharpening tools in a safe place, away from children and pets. |
| Inspect the Knife Before Sharpening | Check for cracks, chips, or damage in the blade that could cause it to break. |
| Use the Right Tool for the Job | Choose the appropriate sharpening tool (e.g., whetstone, honing rod) for your knife type. |
| Clean the Knife After Sharpening | Wipe the blade clean to remove any metal shavings or debris. |
| Test Sharpness Carefully | Test the sharpness by slicing paper or a tomato, not by running your finger along the edge. |
| Keep Children and Pets Away | Ensure no one is nearby while sharpening to avoid accidents. |
Frequently Asked Questions
How Often Should You Sharpen Kitchen Knives?
You should sharpen kitchen knives every 1-2 months. Regular sharpening ensures better performance. It also extends the knife’s lifespan.
Can I Sharpen Kitchen Knives At Home?
Yes, you can sharpen kitchen knives at home. Use a sharpening stone, honing rod, or electric sharpener for best results.
What Tools Do I Need To Sharpen Knives?
You need a sharpening stone, honing rod, or electric sharpener. These tools help achieve a sharp edge effectively.
What’s The Best Angle To Sharpen A Knife?
The best angle is usually 15-20 degrees. This angle provides a sharp and durable edge for most kitchen knives.
Conclusion
Sharpening kitchen knives improves safety and cooking efficiency. Regular maintenance keeps blades sharp. Use a whetstone or honing rod for best results. Practice makes perfect, so don’t get discouraged. Clean and dry knives after each use. Store them properly to maintain their edge.
Sharp knives make cooking enjoyable and more manageable. Remember, a well-sharpened knife is a cook’s best friend. Follow these tips to keep your knives in top shape.

